Google Sheet Inegration
Google Sheets Integration with Worxmate
Introduction:
The integration of Google Sheets with Worxmate provides a versatile solution for managing Objectives and Key Results (OKRs) while utilizing data stored in Google Sheets. This integration allows businesses to align their data management and reporting processes with their overall strategic objectives. This guide will walk you through the process of configuring the integration and setting up automated check-ins for your OKRs based on your Google Sheets data.
By connecting Google Sheets with Worxmate, you can:
- Track OKRs related to financial metrics, project tracking, and other data stored in Google Sheets
- Automatically update key results based on real-time data from Google Sheets
- Align your teams across different functions with company-wide objectives using accessible data
- Generate insightful reports that combine OKR progress with data tracked in Google Sheets
This guide is divided into two sections:
1. Authentication
2. Auto Check-in
1. Authentication
Configuring Google Sheets Integration in Worxmate:
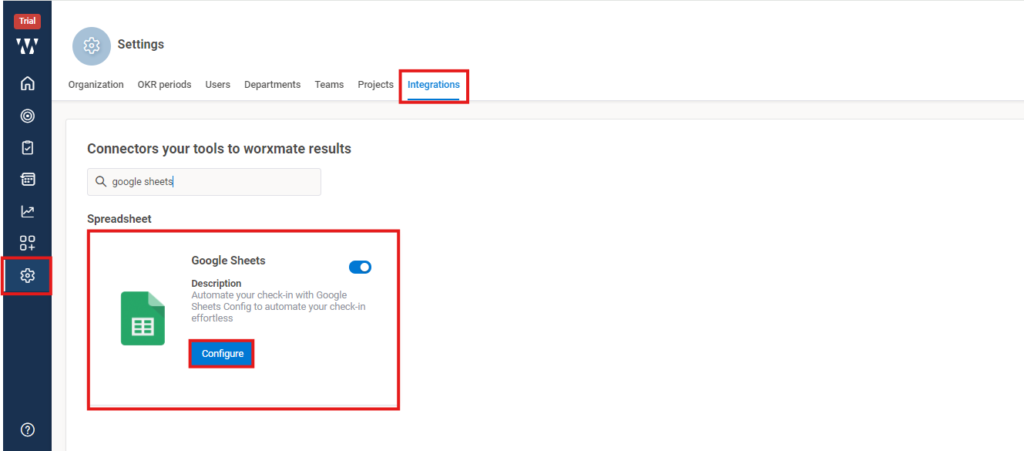
- Log in to your Worxmate account.
- Go to the main menu and click on “Settings.”
- In the Settings menu, find the “Integrations” section.
- Click on the Google Sheets integration option.
Adding the Connection:
- Click on the “Configure” button next to Google Sheets.
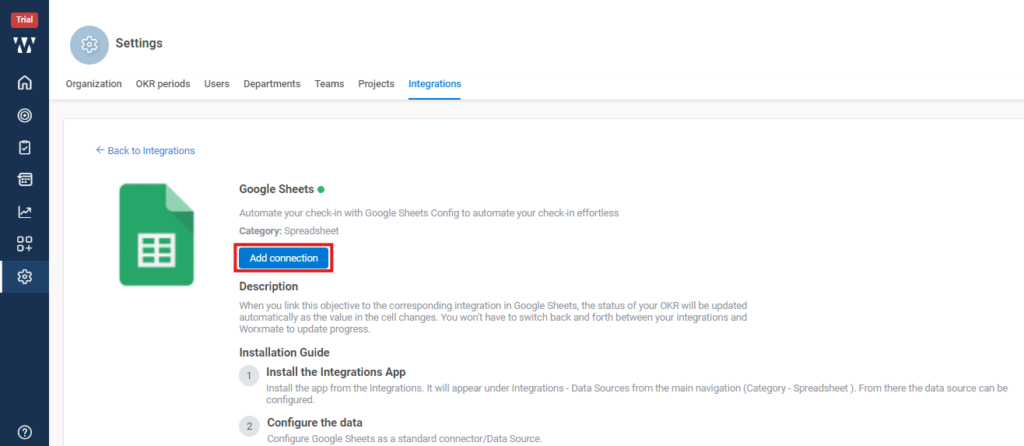
- Select the email account you want to connect.
- A Google consent box will appear; follow the prompts to allow access.

- After granting permission, you’ll be redirected back to Worxmate, where you’ll see your connection has been added.
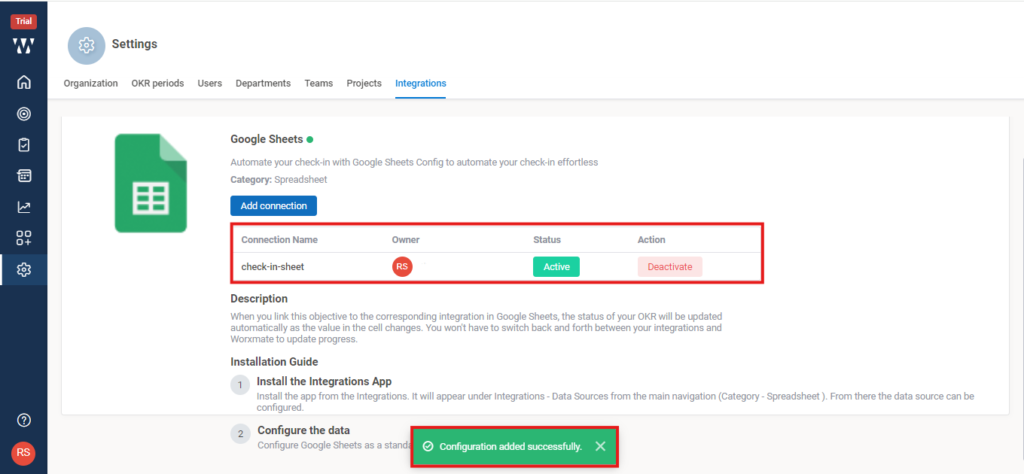
2. Auto Check-In
- Go to the OKR page in Worxmate and add a key result.
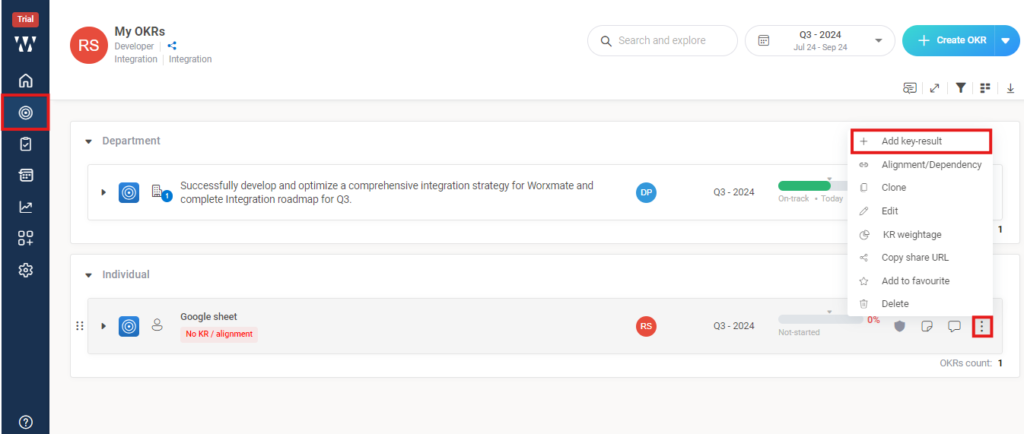
- A drawer will open; select Google Sheets from the dropdown menu.
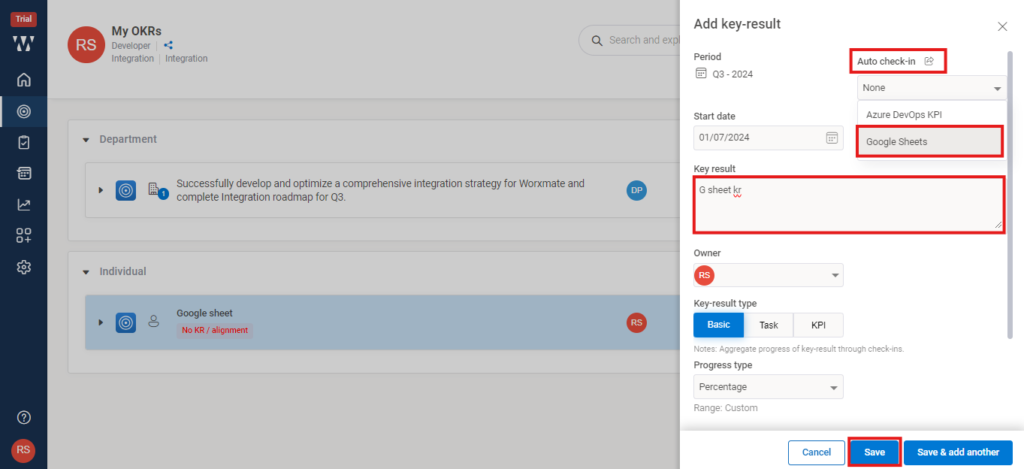
- Choose the spreadsheet, sheet, column, and row that you want to use.
- Click the “Preview” button to view the current value from your selected sheet.
- You’ll be asked to confirm the check-in; click “Yes” to proceed.
- Once done, you’ll see the check-in reflected on your key result.
